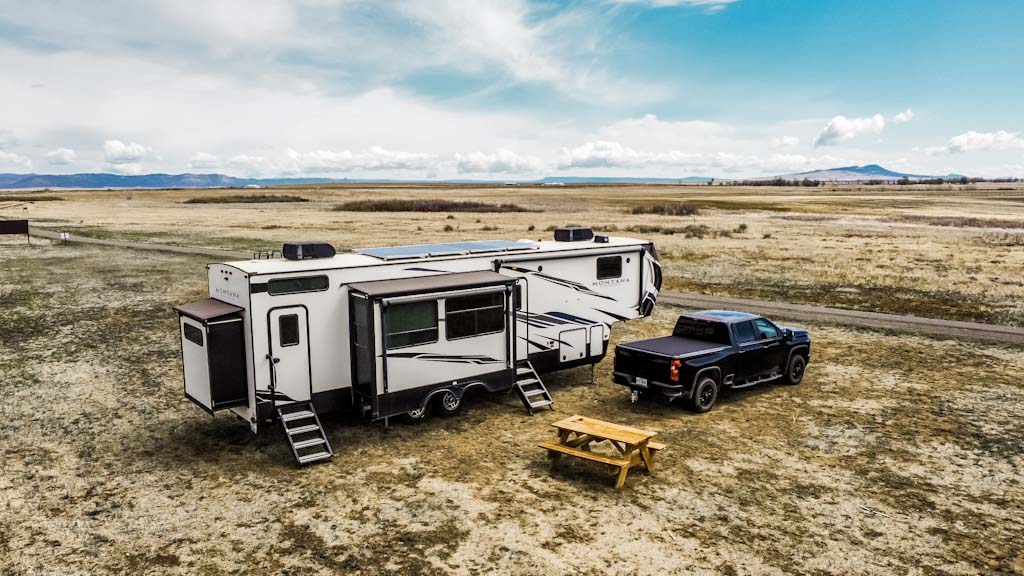
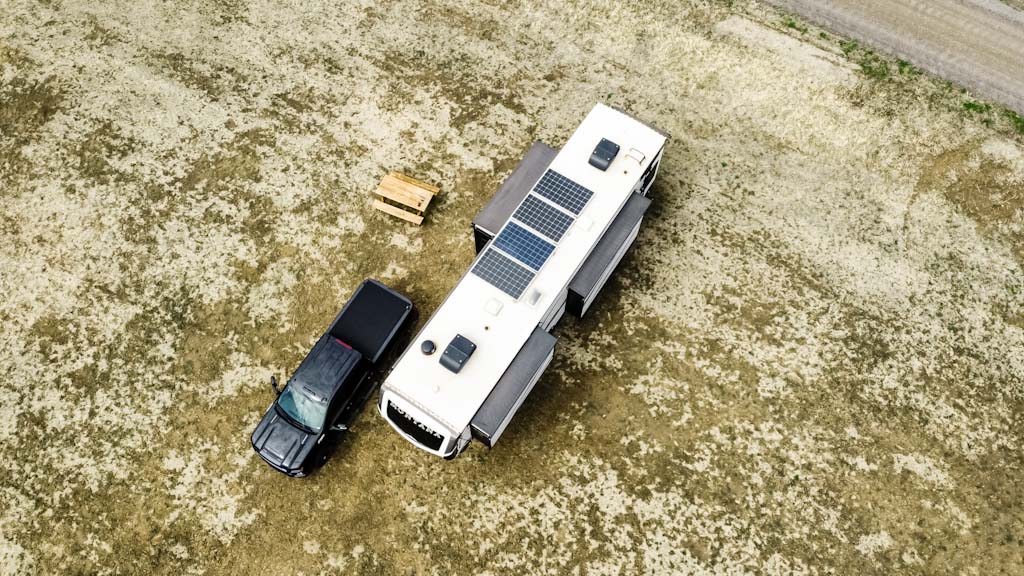
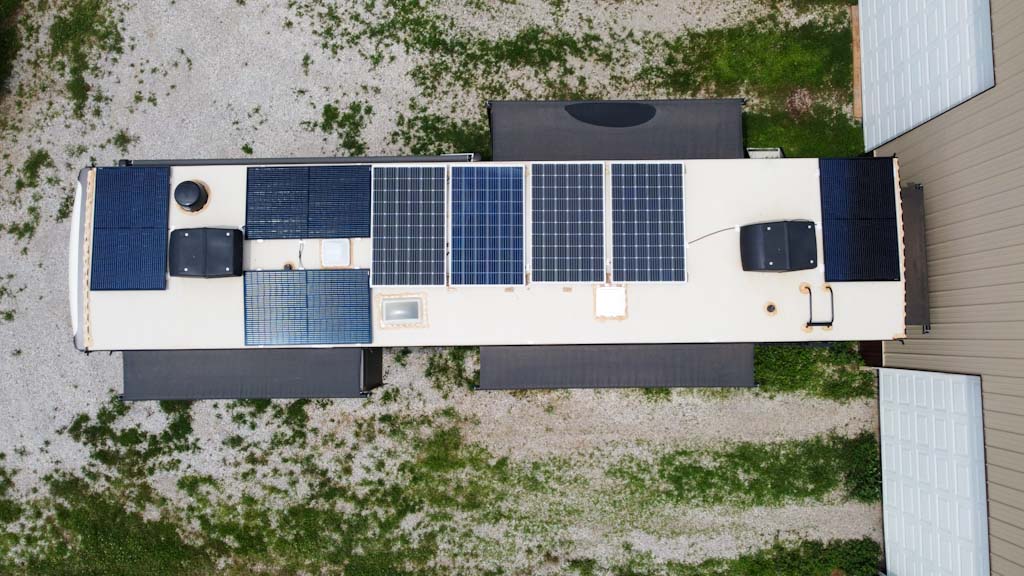
We get asked about our RV solar setup all of the time, so I thought I would write it all out in one place. Our setup is a progression with three stages so I will share them all here. Keep in mind, this is just what we chose…research to figure out what would be best for you and your needs or talk to an RV solar professional. (Don’t worry, we’ll recommend one!)
This post may contain affiliate links and some of the items mentioned are sponsored. As an Amazon Associate, I earn from qualifying purchases. I may receive a small commission when you make a purchase using my links at no extra cost to you. Thank you for your support!
Phase 1 of our RV solar setup
When we first started RVing, we were total newbies. We didn’t know if we were going to like boondocking or RV park camping. Over time we found that we loved boondocking! There was just one problem, we weren’t really set up for it.
New to boondocking? Check out our complete guide to boondocking for beginners!

We started doing some research into solar and knew we wanted to add some but the 5th wheel we started out in wasn’t going to be our permanent rig. In June of 2020, we moved into our new RV and were excited to finally be able to have solar!
We started out with just the factory-installed kit from Keystone. Below is what was included:
- 1x 265W Solar Panel
- 1x Jaboni Solar Charge Controller (replaced in phase 2)
- 2x Interstate Deep Cycle Batteries (no longer used)
- 1x Magnum 2000W Inverter
Total watts of solar: 265W
This system was supposed to allow us to use our residential refrigerator while boondocking and also charge cell phones, laptops, etc. without the batteries going dead.
Yeah, that didn’t happen haha! We found out very quickly that this setup did very little for us. Our batteries were going off in the middle of almost every night and Tucker was having to run our generator even though we had solar.
We knew we were going to have to get a better setup and that’s when phase 2 of our RV solar setup came into play.
Phase 2 of our RV solar setup
We were driving through Colorado on our way up to Montana when I got an Instagram message from Chris at Rocky Mountain Off-Grid. He was looking for some full-time RVers to work with on a solar setup and wanted to know if we might be interested. Perfect timing!
Long story short, we were able to work with Chris from Rocky Mountain Off-Grid, Battle Born Batteries, and Future Solutions to build phase 2 of our RV solar setup. Here is what that added to what we already had:

- 3x 265W Solar Panels
- 2x Victron SmartSolar MPPT 100/50 Charge Controllers
- 1x Victron MultiPlus 3000W
- 1x Victron Venus GX
- 4x Battle Born 100AH Batteries
- 1x Victron BMV-712 Smart Battery Monitor
- 1x Progressive Industries EMS-LCHW50 Hardwired RV Surge Protector
- 2x EasyStart Micro-Air 368 Advanced Soft Starters
- A Custom Aluminum Panel (for all components, switches, BMV, Venus, Charge Controllers, etc., built by Chris)
- 4x Custom Built Aluminum Battery Trays (built by Chris)
Total watts of solar: 1,060W

This phase of our solar system was huge for us! Chris installed everything and did a lot of rewiring that changed our boondocking game. Literally! We no longer needed shore power and could run solely off of solar power.
Now, we were able to use one of our air conditioners with the soft start for several hours, all of the electrical outlets in the whole rig would run off of solar, we didn’t have to worry about our fridge anymore, we could use the microwave, and our batteries would stay charged for days and with proper management, even weeks!
Our only limitation with this setup was that we couldn’t use the second air conditioner, the electric hot water heater, or the electric fireplace with just the solar. If we wanted to use both air conditioners we just had to run our generator with the solar.
Battle Born Batteries
I would say the most important part of this phase was the Battle Born Batteries that we installed. They aren’t a cheap upgrade, but the difference between the original lead-acid batteries and the new Battle Born batteries is worth the upgrade. We have 4 Battle Born batteries that make up our battery bank.

We had lead-acid deep-cycle batteries originally. You could only drain them to about 50% before they had to be recharged. They often wouldn’t even last a full travel day for us before dying.
Our new Battle Born lithium batteries can safely discharge down to 10% before needing to be recharged. They also charge faster and are lighter weight. They have more life cycles than deep cell batteries and they’re safer as well.
Our batteries have over 100 amp-hours each. Battle Born batteries last between 10-15 years and come with a 10-year warranty. So as you can see, even though they are more expensive, they are worth it!
Battle Born batteries have totally changed our boondocking game and I can’t tell you how nice it is to not have to worry about being woken up in the middle of the night by our inverter telling us our batteries were dying!

As long as the sun is shining, we don’t have to worry about anything at all. If it’s been raining or cloudy non-stop for days, then we usually have to run our generator to supplement the lack of sun.
Phase 3 of our RV solar setup
After about 11 months of using that setup, we were traveling through the Denver area again and decided to have Chris install some more solar panels in our solar panel system. The 4 Battle Born batteries that we have been able to support more panels without adding more batteries. Most of the wiring was already done so it was easier than our previous installation when Chris had to change all of the wires.
Here is what we added in phase 3:
- 4x 315W Solar Panels
- 1x Victron SmartSolar MPPT 150/50 Charge Controller
Total watts of solar: 2,320W

The main reason why we added more solar panels was so that we could run one air conditioner without draining the batteries as quickly. We are also able to run our second air conditioner better with the support of the generator.
Eventually, we would like to add a few more solar panels and 2-4 more Battle Born batteries to run the second air conditioner and electric hot water heater. But for now, we are content with our current solar installation and are loving the freedom it gives us to be able to boondock for long periods of time!
What our RV solar setup boils down to
I know, that was a lot of information and lots of technical terms…let me break it down for you:
- 8 Solar Panels (totaling 2,320W)
- 4 Battle Born Batteries
- All of the misc parts that bring it all together
I could write a ton about the different components and their functions, but instead, I will let Chris from Rocky Mountain Off-Grid explain them to you. He was kind enough to film a YouTube video for us explaining our solar panel installation and setup and how it works in more detail. Check that out here or click the video below.
Keep in mind that this video was made in July 2020 after the second phase of our RV solar setup.
Another thing that we love about our solar installation and setup is that we can monitor it right from our phones. We explain this in more detail on the YouTube video but we have an app that acts as a battery monitor among other things. We can see the solar input, the battery’s state of charge, how much electricity is being used through the inverter, and more. All from our phones!
Where you can get a setup like ours from
If you’re looking to add solar to your rig, we highly recommend Rocky Mountain Off-Grid. Chris did a fantastic job with our setup and is very knowledgeable about how solar panels work and all things solar. He can custom-build any setup to be how you need it.
He is located in Erie, CO, but he can ship a setup to you if you are too far away from him. Another bonus is that his prices are far more reasonable than just going to an RV dealership. At least reach out and see what he can do for you! You can contact him here. Be sure and mention “Adventures With TuckNae” for an extra discount!
If you are wanting to replace your batteries with Battle Born batteries, you can find them using our affiliate link here. Using our link doesn’t cost anything extra but it supports our blog and allows us to keep writing content that’s free for you!
Learn More About RV Boondocking:
- A Complete Guide to Boondocking for Beginners (2024)
- 15 Helpful Tips for Saving Water While Boondocking
- Our RV Solar Setup
- Top 45+ Must-Have RV Boondocking Essentials for Dry Camping
- 9 of Our Favorite Boondocking Locations
- 8 Helpful Apps for Boondocking
- Boondocking Review: Maxwell Wildlife Refuge, Maxwell, NM
We hope that you’ve enjoyed learning about our RV solar setup. If you have any further questions, feel free to leave a comment below or DM me on Instagram.

This was so helpful! We don’t have any solar yet but would love to invest in it down the road. It’s all been so confusing to me to figure out what we need so thank you for this!
I’m so glad you found it helpful! ☺️ I’ll be doing another one soon about solar for newbies so hopefully that one will help you too ☺️
Amazing setup! We’ve been talking about getting more solar but need to decide if we are going to change rigs first
That’s exactly what we did first!
Thanks for sharing this Janae! We have really been wanting to try solar to give us more flexibility to boondock but we just haven’t made the jump yet. Taking all the tips and examples we can get.
That’s great Melanie! Let me know if we can help y’all or answer any questions when you’re ready to jump in! 😊