It is important to keep up with your RV hot water heater maintenance. We typically check ours 2-3 times a year and change out our anode rod as often as needed as part of our RV maintenance routine.
RV hot water heater maintenance can be a bit intimidating for new RV owners, but don’t worry; if we can do it, you can too!
I’m going to walk you through step-by-step how we handle our hot water heater maintenance, including changing out an anode rod and flushing your RV hot water heater, and we’ll be answering a few commonly asked questions.
This post may contain affiliate links. As an Amazon Associate, I earn from qualifying purchases. I may receive a small commission when you make a purchase using my links at no extra cost to you. Thank you for your support! Read our Disclaimer Policy for more info.
Preparation and Tools Needed for RV Hot Water Heater Maintenance
There are multiple kinds of water heaters. Both tankless and with a water tank, like the Suburban water heater in our RV.
Suburban water heaters are pretty common on camper trailers and are what we will be showing you today. Ours has both an electric heating element and a gas burner.
Atwood water heaters and Furrion water heaters are also common and are similarly maintained.
Tools and Items Needed for RV Hot Water Heater Maintenance

You will only need a handful of tools, which are listed below:
- A socket wrench (or a crescent wrench and channel lock pliers if you’re like us and need to improvise!)
- A new anode rod
- Plumber’s thread tape
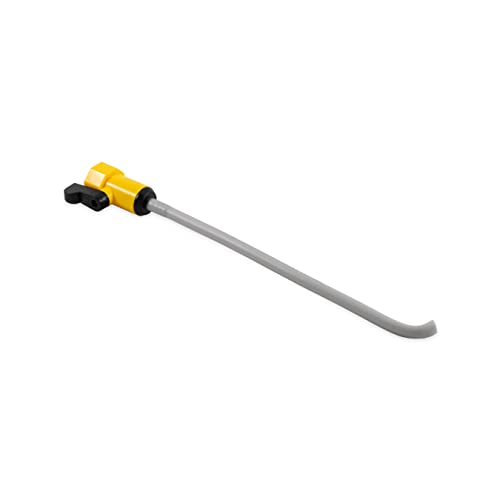
- A Camco water heater tank wand
How to Get Ready
There are a few essential things you need to do before you start. First of all, make sure that your hot water heater is turned off.
This includes both the gas and electric elements, depending on what your RV has. You will want to let it cool off so you don’t burn yourself.
Next, disconnect the fresh water hose from your RV if you are connected to any. You will need water access shortly but have it unconnected to start with.
The next step is to release any pressure in your water lines by opening a water faucet, a drain valve, or a drain plug on your RV.
Then, take the water heater access panel off of your hot water heater and release the air pressure by opening the air pressure relief valve. This is very important, so don’t skip it!
If you’d prefer, you can watch our short YouTube video below instead, where Tucker shows everything as well as gives some other tips. It’s perfect if you’re a more visual learner!
How to Replace an RV Anode Rod and Clean Out Your Hot Water Heater
First, you will use a wrench to remove the existing anode rod. This will result in a lot of water pouring out of your hot water heater…be prepared so you don’t get soaked!
Once all the water has drained out of your RV water heater tank, you are ready to clean the inside of your hot water heater. Start by connecting the wand to a garden hose with good water pressure.
Insert the wand inside the hole where the anode rod came from and turn the hose on. Once again, water will flow out of the hole, so be cautious to avoid getting wet.

Using the wand, spray water all around the inside of your hot water heater using different angles to be sure you get it all.
- Extends the Life of Your Water Heater
- Improves Water Heater Function
- Includes Shutoff Valve
You should see white calcium flakes (or even chunks) of mineral deposits coming out with the water flowing out of the hot water heater. It’s possible you might experience a rotten egg smell.
Once you don’t see any more calcium buildup and you are sure you have it cleaned out, turn the water off and take the wand out. Let all of the water drain out of the hot water tank.
Now you’re ready to install your new anode rod! First, use the plumber’s thread tape to wrap around the thread of your new anode rod.

This ensures a solid seal and keeps water from leaking around the anode rod. Place the anode rod back in the water heater and tighten it.


Refilling Your Hot Water Heater and the Final Steps
Leave the air valve open and reconnect your water hose. Let the hot water heater fill completely before closing the air valve. You will know it is full because water will flow out of the valve.
Once it is full, you can close the air valve and put the cover back on your hot water heater. Be careful in case it is already hot!
And now your RV water heater is good to go again! If you haven’t traveled with your RV in a while, consider completing this maintenance as part of your RV prep before your next trip.
Commonly Asked Questions about RV Water Heater Maintenance
How Often Should You Replace an RV Anode Rod?
How often you need to replace your anode rod is determined by multiple factors and will differ for each individual.
The main factors will be the quality of water you put into your RV and how often you use your hot water heater (i.e., part-time or full-time RVers).
A high-grade water filtration system can drastically improve your water quality. We use the ClearSource Ultra Triple Canister water filtration system while we travel, and it’s fantastic!
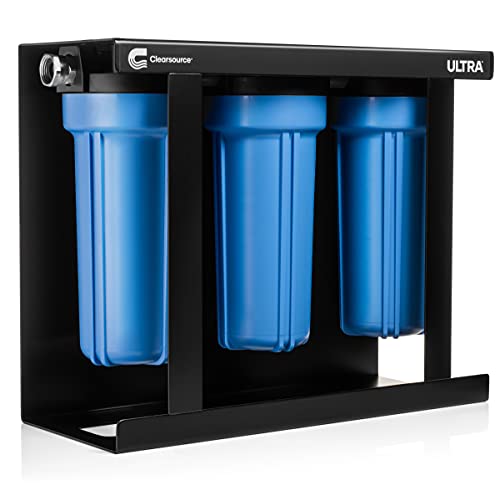
- Protection against viruses, bacteria, & cysts
- 0.2-micron filtering
- Three stage filtration
If you watch the video above, then you know that we were expecting to need to change our anode rod but were happily surprised to find that it still had plenty of use left in it.
We attribute this to the Clearsource filters doing an amazing job of keeping the water quality high! This is one of our recommended RV Essentials.


If you want to purchase a Clearsource system, use our affiliate code TUCKNAE25 for $25 off any system.
You can also use code TUCKNAE for 10% off replacement filters.
Let us know if you have any questions. We have been using Clearsource for over 2 1/2 years and really love it!

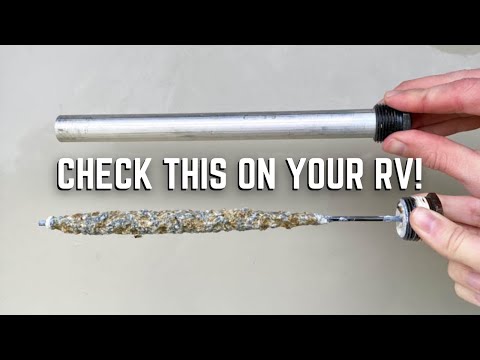
How do you know if your anode rod needs to be replaced?
You will only know if it’s ready to be replaced by removing it from your hot water heater. If it is eaten away by calcium and has just a small “stick” left, it is ready to be replaced.
If there is still a resemblance of a rod, it has life left in it and can be returned to your hot water heater as we did with ours in the video above.
As you can see in the picture below, there will be a significant difference between your new and old anode rods when they are ready to be replaced.

How Often Should RV Water Heater Cleaning/Rinsing Be Done?
Once again, this also depends on how often you use it. Also, if the water quality is good, your anode rod won’t deteriorate as fast, resulting in less buildup in your water heater tank.
We usually clean ours 2-3 times yearly when we check on our RV water heater anode rod. You could clean yours every 2-3 months if your water quality is lower to keep it in tip-top shape.
At a minimum, be sure to add this task to your RV spring cleaning routine.
In Closing: Easy RV Hot Water Heater Maintenance Guide + Cleaning Tips
I hope that you have found this post helpful. Now, you are ready to do your own regular maintenance on your water heater!
Find More RV Tips & Advice
- Advice to Newbie RVers from 32 Full-Time RVers
- 8 Tips to Prepare for RV Travel Days
- 21 Unique Jobs for Full-Time RVers
- 7 Important RV Living Safety Tips
- RV Tip: How To Keep Glass Plates From Breaking in an RV
- Winter RV Camping Guide: 13 Tips for RVing in Cold Weather
- Easy RV Hot Water Heater Maintenance Guide + Cleaning Tips
- 101 Inspirational RV Quotes & the Best RV Camping Captions
- The 60+ Best RV Games For Indoor & Outdoor Camping Fun
- A Full-Time RVers Complete Guide to RV Laundry Solutions
- 10 of the Best RV Plants to Grow in an RV
- The Ultimate RV Spring Cleaning Guide (+FREE Checklist!)
- 30+ RV Living Pros and Cons from Full-Time RVers
Be sure to pin this post for later by clicking here.