
In this post, we want to share with you how to DIY RV roof repair. Living in an RV has amazing moments, but things also go wrong.
Knowing how to DIY a lot of the things that can break or mess up will save you not only a lot of money on RV repairs but could also save you a lot of potential time in the shop!
This post may contain affiliate links. As an Amazon Associate, I earn from qualifying purchases. I may receive a small commission when you make a purchase using my link. Read our Disclaimer Policy for more info.
How we got a tear in the roof of our RV
We try to plan our routes carefully to avoid low-hanging objects over the road. Sometimes, though, we find ourselves in unplanned situations.
This is how we ended up with a few small tears on the roof of our RV.
We had to turn down a side street with low-hanging trees.
We thought we were clear of the branches, but we ended up catching a few of them on the far left side of the roof. There were a total of 4-5 small holes in the side of the roof.
Initially, we didn’t check the roof because we didn’t think we hit anything.
That proved to be a mistake, though, and a lesson we learned from!
Pro tip: Make sure to thoroughly clean and check your RV during your camper spring cleaning.

A few weeks later, we endured a severe thunderstorm and a LOT of rain. During the storm, we found that we had a small amount of water leaking through one of the light fixtures in the bathroom.
Thankfully, we did not end up with any permanent water damage.
After the storm, Tucker went up on the roof, and that is when he discovered the holes.
He patched it as best he could with heavy-duty gorilla tape and then ordered the materials needed to do an RV roof repair.
The EPDM rubber roofing material that most RVs come with is generally pretty tough as far as roofing materials go.
Rubber roofs last for years, but they do tear if caught hard enough.
Repairing an EPDM roof is much cheaper than an entire roof replacement, so it makes more sense to repair your RV’s roof material instead of putting on a new travel trailer roof.
We will show you in this post just how easy it is to DIY!
RV roof repair steps and materials

Materials needed for an RV roof repair
You only need a few items to repair your camper roof.
- Scissors
- Rubbing Alcohol
- Rags or Paper Towels
- Dicor 501LSW-1 EPDM Self-Leveling Lap Sealant
- Eternabond RV Rubber Roof & Leak Repair Tape
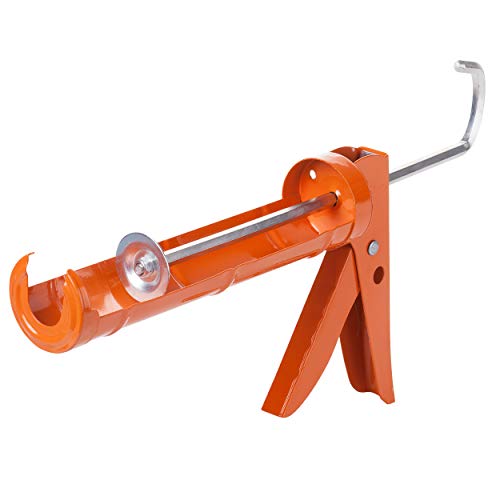
- A Caulk Gun

|

|
|
|
Primary Rating:
4.8
|
Primary Rating:
4.7
|
Primary Rating:
4.5
|
|
$31.79
|
$10.00
|
$9.85
|
As you can see, you don’t need to purchase many materials, and they are relatively inexpensive.
We had everything on hand already except for the Dicor Lap Sealant and the Eternabond tape, which cost us less than $50 total.
Much cheaper than taking our RV to the shop for repairs or even an RV roof replacement!
The first step is cleaning the roof
First up, remove any temporary patches.
In our case, this meant removing the gorilla tape that we had used as a temporary fix while we waited for the materials we ordered to arrive.
You’ll want to clean the area around the tear that you will be patching well.
This allows the patch to properly adhere and will prevent future leaks.
If the damaged area has old Dicor, you must remove as much as possible.
To clean the roof, use rubbing alcohol and either a rag or paper towels.
Tucker went over the area 2-3 times to make sure it was cleaned really well. Let it dry completely before moving on.
Secondly, apply the Eternabond RV Rubber Roof & Leak Repair Tape

After the area has thoroughly dried from cleaning, it’s time to add the Eternabond tape, which is an RV roof repair tape.
Eternabond makes the best RV roof tapes and is a great product to have on hand for the emergency repair of a leaky roof.
You will want to measure out how much you need and cut a piece accordingly.
Remove the backing and apply carefully over the tear in the roof.
Once it has touched the roof, it adheres pretty quickly, so you’ll want to make sure and position it right the first time.
Start with one side and smooth it out.
Press firmly and continue to rub it and smooth out the patch for several minutes.
Next, coat the entire patch with Dicor 501LSW-1 Epdm Self-Leveling Lap Sealant.
Using a caulk gun, coat the entire patch with Dicor 501LSW-1 Epdm Self-Leveling Lap Sealant.
This rubber sealant creates a secure secondary seal on your rubber roofing and ensures that the leak is properly sealed.
This is likely the same sealant that was used on your RV roof to seal around the roof vents, air conditioners, etc.
There are a lot of Dicor RV roof repair products that you can buy including roof coatings, roof sealant, and more for the surface of your roof.

Start on the edges and work your way around the entire patch, filling in the middle as you go.
If the damage is on the edge of your camper roof, like ours was, you may have some Dicor that runs down the side.
Wipe any excess off and don’t allow it to run down too far.
This is a self-leveling sealant so you should end up with a fairly level patch.
According to the manufacturer, it will be waterproof in 4 hours, 80% cured in 48 hours, and 100% cured in 30 days.
So over time, it will completely harden, and you won’t have to worry about it anymore.

FAQ
What is the best way of repairing the RV roof leak? Do it yourself or hire some professionals?
If the leak in your RV roof is a small area, the best way to repair it is to follow our step-by-step guide and repair the damaged area yourself to fix the small leak. If there is extensive damage, then the problem area might need to be assessed by professional repair services.
How much does a RV roof repair cost?
A simple RV roof repair, as we did on our repair job, is relatively inexpensive and should cost less than $50 for DIY RV owners. To replace an entire RV roof with significant damage would result in much more costly repairs.
Conclusion: DIY RV Roof Repair
I hope that you have found the information in this post helpful.
Be sure and pin this post for future reference in case you might need it later on!
To prevent RV roof issues, checking your roof regularly during RV maintenance is a good idea.
This will give you peace of mind and verify that your roof is in great shape.
Find More RV Tips & Advice
- Advice to Newbie RVers from 32 Full-Time RVers
- 8 Tips to Prepare for RV Travel Days
- 21 Unique Jobs for Full-Time RVers
- 7 Important RV Living Safety Tips
- RV Tip: How To Keep Glass Plates From Breaking in an RV
- Winter RV Camping Guide: 13 Tips for RVing in Cold Weather
- Easy RV Hot Water Heater Maintenance Guide + Cleaning Tips
- 101 Inspirational RV Quotes & the Best RV Camping Captions
- The 60+ Best RV Games For Indoor & Outdoor Camping Fun
- A Full-Time RVers Complete Guide to RV Laundry Solutions
- 10 of the Best RV Plants to Grow in an RV
- The Ultimate RV Spring Cleaning Guide (+FREE Checklist!)
- 30+ RV Living Pros and Cons from Full-Time RVers


I keep thinking hopefully this is something I’ll never have to deal with but I know that’s not the case! Thank you for sharing your experience and providing clear cut instructions on how to fix it!
I definitely hope you never have to deal with this too!
Although, I hope we don’t need this information…. It will be super helpful if we do!! Love you guys were able to fix it yourself!!
We were pleasantly surprised at how easy it was!
This is great Janae! We’ve never had to do this and I didn’t realize it could be relatively easy. Thanks so much for putting together such a detailed ‘how-to’!
Hopefully you’ll never have to!
Thanks for the step by step guide!! We always try to fix things ourself if we can over taking it into a shop to get repaired
Same! It definitely saves time and money! 🙌🏻
Yikes, we’ve never had a tear, but if we got help from someone regarding one, it would be YOUR advice we’d want! Thanks so much, Janae!
Thanks Janae for writing a great DIY post. I want to share my experience with you as the roof of the RV holds the most importance because it is the backbone of the whole camper. Sometimes while sitting idle, some mold or algae can start to appear because of the humidity in the weather. To avoid these risks, I always apply “RV Roof Magic” because it gives me a complete tension free 5+ years of assurance from all odds of roof damages and maintains the temperature inside the camper by forming an insulation membrane.
Thanks for the video. I just had a similar tear on our current trip. I’ll be following your vidoe to fix mine this week.
Thanks again and best of luck.
Dave
You’re welcome, I’m so glad you found it helpful! Sorry to hear about your tear but I’m sure you’ll have it fixed up and back to normal soon!